Today's recipe goes hand in hand with my appearance on Savour the Flavour (link here: https://www.youtube.com/watch?v=5tjoMCjAVWg). Of course as the video concluded I realized one thing: I forgot to mention the blog address. Whoops. Well, if you're reading this you've already found me. Did you come here because of Savour the Flavour or do you already follow this blog? Let me know in the comments.
What is chicken mole? Well, the thing to understand about mole is that the word is something of a catch-all word for sauce. However in the U.S. it is commonly understood that it very often refers to a type of sauce featuring chocolate and spices called mole sauce, or mole poblano. The dish originates in Mexico, although there is some debate as to whether it comes from the state of Puebla, Oaxaca or Tlaxcala. In restaurants it is served over chicken enchiladas: shredded roasted chicken and soft mild cheese rolled in soft corn tortillas. They are served with a generous amount of mole sauce and a drizzle of mild, loose Mexican sour cream called crema, as well as sprinkled with
[record scratch] Wait a minute, I can hear my dear readers thinking in their heads. Did she just say chicken and chocolate? I sure did. You're probably wondering how they go together. Well, the amazing thing about mole poblano is the depth of flavor imparted by its many ingredients. Smoky adobo, redolent with spice and personality is a subtle compliment to the rich, bittersweet chocolate. The chocolate flavor pairs incredibly well with mild corn tortilla and the richness of the sauce, enhanced by a nut paste, goes surprisingly well with chicken and chicken fat. It's got a lot of ingredients, but don't be intimidated. It's easier than you'd think and so worth it.
Mole Enchiladas
1/4 cup roasted peanuts
1/4 cup blanched almonds
2 Tablespoons sesame seeds
1 clove star anise
1 cinnamon stick
4 ounces bittersweet chocolate, chopped
1 disk Mexican chocolate
2 roasted habanero, seeds and ribs removed
2 Tablespoons adobo paste
5 spice cloves, heads only
2 Tablespoons powdered baking chocolate
[Up to] 4 cups chicken stock
1 onion, roughly chopped
[Up to] 1/4 cup coconut oil or lard
4 tomatillos, roasted
Salt, to taste
4 cloves roasted garlic
Toppings & Garnishes:
Crema
Queso Blanco
Minced Cilantro
For enchilada assembly:
2 lbs shredded chicken
8 ounces fresh mozarella, chopped into small bits
1 package soft corn tortillas
1. Add oil or lard to cover the bottom of a medium sized saucepan over medium heat. Add onions and salt to taste and cook without stirring for up to 4 minutes. Stir and then leave for another four minutes. When they are just browned, remove from heat and set aside.
2. Meanwhile, add oil or lard to cover the bottom of a small saucepan heated to low-medium and toast nuts, sesame, cinnamon stick, cloves and star anise for 1.5 to 2 minutes. Remove from heat and allow to cool.
3. Set cinnamon stick aside and pulse nuts, sesame and spices in the blender, 3 pulses about 5 seconds each.
4. Add tomatillos, habaneros, adobo paste, 2 cups chicken stock, onions, garlic. Pulse in blender 5 times at 5 seconds each.
5. Strain contents of blender through sieve and reintroduce to larger saucepan. Add cinnamon stick back in and bring to a lazy simmer. Thin with remaining chicken stock until sauce reaches the desired consistency.
6. While sauce simmers over the lowest heat setting, preheat the oven to 325 degrees and in a baking dish assemble chicken enchiladas: pile a generous amount of chicken and chopped mozzarella in a line down the center of a corn tortilla in a 3:1 ratio (chicken to cheese); roll tortilla up and place in baking dish. Continue rolling tortillas up with chicken and cheese and placing into the baking dish until the dish is filled with rolled up tortillas, fitting snugly inside. Bake until cheese is melted (about 7 to 10 minutes).
6. Remove sauce from heat, fish out and discard cinnamon stick and add chocolate in all forms, stirring to melt and incorporate.
7. Remove enchiladas from oven and pour desired amount of sauce over them.
8. Serve enchiladas drizzled with crema and sprinkled with cilantro and crumbled queso blanco.
I hope you enjoy this recipe and I welcome your feedback!
Sunday, February 22, 2015
Monday, February 9, 2015
Chocolate Crepe Suzette
Chocolate. Crepe. Suzette. Need I say more? Well, ok I should probably mention two things: one, that crepes suzette is a dish with an orange-y caramel sauce; and two, that I've been planning this dish since I found out I would be hosting chocolate month on my favorite G+ group, Foodies+. I was so excited I immediately started to plan my chocolate dishes. I thought about how well orange goes with chocolate and hit upon the idea of making chocolate crepes with an orange sauce. I didn't get any pictures of the flambee (with the abundance of other ingredients in the sauce it flamed kind of a disappointing amount), but I did manage to cut a cute heart and star out of the squeezed out orange shell. I you've never formed crepes before they do take a little practice. Ladle the batter in the center, then swirl gently in a circular motion to spread the batter outward. If you can get this technique down you can create perfectly thin crepes with delicate edges. In no time at all you'll be turning out professional looking crepes. A crepe pan isn't absolutely necessary, but it is a big help. If you don't have one a frying pan will do; the lighter the pan the better.
Chocolate Crepes Suzette
Makes 6 crepes (if every drop of batter is used)
For the crepes:
3/4 cup plus 1 Tablespoon AP Flour
2 eggs
1 cup milk
2 Tablespoons butter, melted and cooled
3 Tablespoons powdered baking chocolate
1 Tablespoon super fine caster sugar
1. Whisk eggs, then add milk. Whisk together, then add flour and incorporate.
2. Add chocolate powder and sugar and whisk in. Lastly, whisk butter.
3. Set aside for at least 1/2 hour. Meanwhile, make the sauce (see recipe below).
4. When the batter has sat for 30 minutes, heat a light frying pan and add enough butter to cover the bottom and sides.
5. When the butter is sizzling, add a full soup ladle full of batter into the pan toward the center. Swirl gently to spread the batter to the outer edges of the pan. Cook until starting to brown, 1 - 2 minutes. Flip and cook for an additional 1 - 2 minutes. Set aside on a plate and repeat with remaining batter until it is used up.
For the sauce suzette:
4 Tablespoons butter
4 Tablespoons sugar
Zest of 1/2 orange
Juice of 1 orange
2 Tablespoons cointreau or grand marnier
1 Tablespoons cognac
1 pinch salt
1. Melt butter in heavy bottomed sauce pan over low heat.
2. Add orange zest, sugar, and a pinch of salt and allow to melt, whisking occasionally, about 10 minutes.
3. Add liquor and ignite. Alcohol will burn off, allowing sugar to finish caramelizing.
4. Add fresh orange juice. Stir to incorporate.
5. Serve over chocolate crepes and finish with some good quality chocolate, grated.
I hope you enjoy this recipe and I welcome your feedback!
Chocolate Crepes Suzette
Makes 6 crepes (if every drop of batter is used)
For the crepes:
3/4 cup plus 1 Tablespoon AP Flour
2 eggs
1 cup milk
2 Tablespoons butter, melted and cooled
3 Tablespoons powdered baking chocolate
1 Tablespoon super fine caster sugar
1. Whisk eggs, then add milk. Whisk together, then add flour and incorporate.
2. Add chocolate powder and sugar and whisk in. Lastly, whisk butter.
3. Set aside for at least 1/2 hour. Meanwhile, make the sauce (see recipe below).
4. When the batter has sat for 30 minutes, heat a light frying pan and add enough butter to cover the bottom and sides.
5. When the butter is sizzling, add a full soup ladle full of batter into the pan toward the center. Swirl gently to spread the batter to the outer edges of the pan. Cook until starting to brown, 1 - 2 minutes. Flip and cook for an additional 1 - 2 minutes. Set aside on a plate and repeat with remaining batter until it is used up.
For the sauce suzette:
4 Tablespoons butter
4 Tablespoons sugar
Zest of 1/2 orange
Juice of 1 orange
2 Tablespoons cointreau or grand marnier
1 Tablespoons cognac
1 pinch salt
1. Melt butter in heavy bottomed sauce pan over low heat.
2. Add orange zest, sugar, and a pinch of salt and allow to melt, whisking occasionally, about 10 minutes.
3. Add liquor and ignite. Alcohol will burn off, allowing sugar to finish caramelizing.
4. Add fresh orange juice. Stir to incorporate.
5. Serve over chocolate crepes and finish with some good quality chocolate, grated.
I hope you enjoy this recipe and I welcome your feedback!
Friday, February 6, 2015
Chard and Beer Caramelized Onion Quiche
I recently read somewhere that swiss chard was in season. I can't remember where I read it, but I must not have noticed the date, because as it turns out, chard season has long since passed. Here in California we are lucky to get some lovely chard all year, grown in a greenhouse. If you aren't as fortunate then you may have to be patient and try this recipe out next summer and fall. I am particularly fond of the red chard, both for its strong flavor and the gorgeous deep red color of the stems. Because I had chard in mind I began to think of a fun dish to center around this interesting ingredient. Sweet caramelized onions, given a bit of a bite by a beer deglazing, perfectly compliment the herbaceous acidity of the chard. Small crumbles of feta provide a salty pop of flavor, the salinity balancing the almost so-bitter-it's-sweet chard. The three flavors are wonderful together in a dish, but the star of this quiche is actually the consistency: soft and creamy, reminiscent of the incredibly silken and decadent quiche we enjoyed at a cafe in Paris. The key is plenty of cream and a surfeit of finely graded melt-y cheese, such as gruyere or cheddar. Try to choose something that doesn't have too much personality. Another key to a soft quiche is to cook it for a long time at a lower temperature, just until set. I'll admit I got lazy and decided to cheat with a store bought crust. The one I chose with vegetable shortening made me not regret it. If you make a mean pie crust and don't mind the work, by all means make your own.
Red Swiss Chard and Beer Caramelized Onion Quiche with Feta Cheese
1 (10 ounce) bunch of swiss chard
1/2 large yellow onion, diced
3 ounces good ipa or another pale ale
2 Tablespoons olive oil, separated
1 ounce feta cheese crumbles
1 store bought shortening pie crust
4 ounces gruyere cheese, finely grated
1 cup heavy cream
4 eggs
tiny pinch of nutmg
salt, to taste
pepper, to taste
1. Prepare the red swiss chard: chop of stems approximately 2" below the leaves and discard stems. Chop leaves and remaining bits of stem into bite sized pieces. Heat a large saucepan over medium heat and add 1 Tbl olive oil. Add chard and a small pinch of salt and saute about 10 minutes, stirring occasionally. Add about 3 Tablespoons of water and cover the chard. Turn the heat down to low and allow to steam gently for about 15 minutes.
2. Meanwhile, caramelize the onions: saute onions in remaining olive oil, and salt and pepper to taste over medium heat, stirring every 3 - 4 minutes until caramelized (dark brown on all sides). Deglaze the pan with beer. When the chard is tender and the onions have been beer-ified, set both aside to cool.
3. Take your shortening crust out of the freezer and pre-bake it. Even if you're using a homemade crust you want to pre-bake it so it doesn't turn soggy. For a pre-made frozed crust: defrost the crust for 10 minutes while preheating the oven to 400 degrees. Pierce defrosted crust all over over with a fork and bake for 10 - 12 minutes, until the crust is barely starting to turn golden.
4. Set crust aside to cool. In a mixing bowl combine eggs, cream, gruyere, nutmeg, salt and pepper to taste.
5. Turn oven down to 275 and and assemble quiche in cooled pie crust: layer chard, then onions, then the feta, crumbled finely. Pour egg batter over all of the ingredients.
6. Bake for 25 minutes. Turn oven up to 300 and bake for another 20 - 25 minutes, or until top begins to color and a toothpick inserted into the center of the pie comes out clean.
Serve and enjoy! The French like to serve their quiche alongside lightly dressed spring salad mix.
I hope you enjoy this recipe and I welcome your feedback!
Red Swiss Chard and Beer Caramelized Onion Quiche with Feta Cheese
1 (10 ounce) bunch of swiss chard
1/2 large yellow onion, diced
3 ounces good ipa or another pale ale
2 Tablespoons olive oil, separated
1 ounce feta cheese crumbles
1 store bought shortening pie crust
4 ounces gruyere cheese, finely grated
1 cup heavy cream
4 eggs
tiny pinch of nutmg
salt, to taste
pepper, to taste
1. Prepare the red swiss chard: chop of stems approximately 2" below the leaves and discard stems. Chop leaves and remaining bits of stem into bite sized pieces. Heat a large saucepan over medium heat and add 1 Tbl olive oil. Add chard and a small pinch of salt and saute about 10 minutes, stirring occasionally. Add about 3 Tablespoons of water and cover the chard. Turn the heat down to low and allow to steam gently for about 15 minutes.
2. Meanwhile, caramelize the onions: saute onions in remaining olive oil, and salt and pepper to taste over medium heat, stirring every 3 - 4 minutes until caramelized (dark brown on all sides). Deglaze the pan with beer. When the chard is tender and the onions have been beer-ified, set both aside to cool.
3. Take your shortening crust out of the freezer and pre-bake it. Even if you're using a homemade crust you want to pre-bake it so it doesn't turn soggy. For a pre-made frozed crust: defrost the crust for 10 minutes while preheating the oven to 400 degrees. Pierce defrosted crust all over over with a fork and bake for 10 - 12 minutes, until the crust is barely starting to turn golden.
4. Set crust aside to cool. In a mixing bowl combine eggs, cream, gruyere, nutmeg, salt and pepper to taste.
5. Turn oven down to 275 and and assemble quiche in cooled pie crust: layer chard, then onions, then the feta, crumbled finely. Pour egg batter over all of the ingredients.
6. Bake for 25 minutes. Turn oven up to 300 and bake for another 20 - 25 minutes, or until top begins to color and a toothpick inserted into the center of the pie comes out clean.
Serve and enjoy! The French like to serve their quiche alongside lightly dressed spring salad mix.
I hope you enjoy this recipe and I welcome your feedback!
Sunday, February 1, 2015
Earl Grey Chocolate Truffles
This Valentine's Day, why not homemake your sweetie's chocolates to show them how much you care? It is surprisingly easy. Instead of tea leaves you can customize these truffles by whisking a little alcohol into your cream mixture before pouring it over the chocolate. To temper your chocolate, melt 3/4 of the chocolate reserved for the shells and bring the temperature of the melted chocolate quickly down by removing the chocolate from the heat and adding the remaining 1/4 chopped chocolate
These chocolates are special because the bitter tea balances with the bitter chocolate and both are mellowed out enough to bring the brassy citrus flavors of the black tea to the fore to really elevate the taste of the truffles.
Earl Grey Truffles
3/4 cups cream
3 Tablespoons unsalted butter, melted and clarified
3/4 Tablespoon loose Earl Grey tea leaves
8 ounces good quality (70% or better) semi sweet dark chocolate, chopped
5 ounces good quality milk or dark chocolate, chopped
1. Create the ganache: heat cream over low heat and add tea, allowing it to steep for 10 to 20 minutes. Bring cream up to a low boil and turn heat off immediately. Add clarified butter to cream and whisk to combine.
2. Place your 8 ounces chopped dark chocolate into a stainless steel bowl and pour hot cream and butter mixture through a sieve into the chocolate.
3. Stir to melt chocolate with the heat from the cream and butter mixture. When everything has been combined and all chocolate has been melted, set aside in a dry, cool place to come to room temperature.
4. In roughly 30 minutes, when the ganache has set, form into Tablespoon sized balls. Cover tightly and set briefly in the fridge while you melt the remaining chocolate.
5. Fill the bottom of a double boiler with about 3 inches of hot water and bring to a temperature just below a simmer. Put 5 ounces chopped chocolate in the top layer of the double boiler and melt, stirring frequently to avoid burning.
6. Take melted chocolate off of the heat and dip ganache balls into it one by one, balanced on the tines of a fork. Shake excess chocolate off after each truffle is dipped. Set covered truffles on a parchment lined sheet tray to cool. Store in an airtight container in the fridge, or serve immediately to your sweetie.
These chocolates are special because the bitter tea balances with the bitter chocolate and both are mellowed out enough to bring the brassy citrus flavors of the black tea to the fore to really elevate the taste of the truffles.
Earl Grey Truffles
3/4 cups cream
3 Tablespoons unsalted butter, melted and clarified
3/4 Tablespoon loose Earl Grey tea leaves
8 ounces good quality (70% or better) semi sweet dark chocolate, chopped
5 ounces good quality milk or dark chocolate, chopped
1. Create the ganache: heat cream over low heat and add tea, allowing it to steep for 10 to 20 minutes. Bring cream up to a low boil and turn heat off immediately. Add clarified butter to cream and whisk to combine.
2. Place your 8 ounces chopped dark chocolate into a stainless steel bowl and pour hot cream and butter mixture through a sieve into the chocolate.
3. Stir to melt chocolate with the heat from the cream and butter mixture. When everything has been combined and all chocolate has been melted, set aside in a dry, cool place to come to room temperature.
4. In roughly 30 minutes, when the ganache has set, form into Tablespoon sized balls. Cover tightly and set briefly in the fridge while you melt the remaining chocolate.
5. Fill the bottom of a double boiler with about 3 inches of hot water and bring to a temperature just below a simmer. Put 5 ounces chopped chocolate in the top layer of the double boiler and melt, stirring frequently to avoid burning.
6. Take melted chocolate off of the heat and dip ganache balls into it one by one, balanced on the tines of a fork. Shake excess chocolate off after each truffle is dipped. Set covered truffles on a parchment lined sheet tray to cool. Store in an airtight container in the fridge, or serve immediately to your sweetie.
Tuesday, January 20, 2015
Shiitake Tsukune: Char Grilled Chicken Meatballs with Shiitake Mushrooms
Recently I wrote a review of a local restaurant for another website. This restaurant serves one of my favorite kinds of Japanese food: Yakitori. Yaki means grilled and tori originally referred to grilled chicken, but yakitori skewers can be ordered as everything from vegetables to seafood to beef and bacon. And chicken. Of course chicken. Some of the best skewers are chicken meat skewers. I'm a big fan of the crispy chicken skin skewers, crackling and deliciously greasy with fat. The delectably tender tiny chicken wings are also quite delightful. My favorite chicken skewer--in fact my favorite yakitori skewer, period--is the sumptuously tender and flavor filled dark meat chicken meatballs called tsukune. The restaurant I reviewed does a variant with minced mushrooms called shiitake tsukune. The smoky meatballs, made from the more succulent dark meat, are enhanced by the earthy, chewy mushrooms. The rich sweet yet savory tare sauce that is brushed onto them at the end makes them irresistible. Seriously. We finished these meatballs in one night. No leftovers. Granted, we had to roll to bed, but it was worth it. So worth it!
I want to share my attempt at recreating this dish at home. As a base I used this recipe from Serious Eats, with some tweaks. The amount of meatballs you can make depends on how large you make them, but I estimate you can make 10 - 12 skewers with 4 meatballs each on them. If the meatballs are too loose to stay on your skewers, add some more panko to your meatball mix and try again. Also, if you buy your shiitake mushrooms whole, as I did, the stems make an excellent stock after they've been roasted, then simmered in a stock pot for about 1 hour.
Shiitake Tsukune - Char Grilled Chicken Meatballs with Shiitake Mushrooms
For the tare sauce:
1/2 cup low sodium soy sauce
1/2 cup mirin (rice wine, similar to sherry and different from sake)
1/4 cup sake
1 Tablespoon Rice Wine Vinegar
2 Tablespoons light brown sugar
1 Teaspoon whole black peppercorns
1/2 Teaspoon sesame seeds
1/2 Teaspoon toasted sesame oil
2 cloves of garlic, pressed or minced
1" piece of ginger, grated
1. In a small heavy bottomed saucepan over medium heat, toast sesame seeds for 2 - 3 minutes.
2. Add all ingredients, bring to a gentle boil, then lower heat down to a simmer.
3. Simmer for about 30 minutes uncovered, to reduce.
4. Remove from heat and pour into a storage or serving container, straining through a sieve.
5. Brush sauce on tsukune before serving
For the tsukune (chicken meatballs):
1 3/4 lbs ground dark meat chicken, preferably chicken thighs*
1/2 yellow onion, roughly diced
1 shallot clove, roughly diced
2 garlic cloves, pressed or minced
1/4 cup shiitake mushroom caps, roughly chopped
1 jumbo egg
2 Tablespoons Mirin
1/2 cup panko
1 Tablespoon vegetable oil
soy sauce, to taste
freshly ground black pepper, to taste
1. Caramelize the onions and shallots: in a heavy bottomed saucepan over medium heat, add oil, then shallots, then onions, and a small dash of soy sauce stirring frequently.
2. After about 5 minutes, add mushrooms and black pepper. Cook until all ingredients are thoroughly cooked through and the onions and shallots leave brown residue on the bottom of the pan.
3. Add sherry to deglaze, stirring vigorously to bring the caramelized sugars up from the pan.
4. Add garlic and cook for one minute. Remove from heat, taste and adjust seasoning. Allow to cool, then pulse in a blender until the mixture forms a rough paste. About 3 pulses 3 seconds each.
5. When mix has cooled and been blended, mix all ingredients together and form the mix into meatballs.
6. Place four meatballs on each skewer. Cook on a covered grill, just indirect of the heat, for about 5 - 7 minutes at about 350. Flip skewers and cook, covered, for another 5 - 7 minutes, or until meatballs are cooked all the way through.
7. Brush with tare sauce and serve.
I hope you enjoy this recipe and I welcome your feedback!
*I ground my own chicken, using only skinless boneless chicken thighs in my Ninja blender. If you have a grinder or some way to grind up the meat I highly suggest doing so yourself.
I want to share my attempt at recreating this dish at home. As a base I used this recipe from Serious Eats, with some tweaks. The amount of meatballs you can make depends on how large you make them, but I estimate you can make 10 - 12 skewers with 4 meatballs each on them. If the meatballs are too loose to stay on your skewers, add some more panko to your meatball mix and try again. Also, if you buy your shiitake mushrooms whole, as I did, the stems make an excellent stock after they've been roasted, then simmered in a stock pot for about 1 hour.
Shiitake Tsukune - Char Grilled Chicken Meatballs with Shiitake Mushrooms
For the tare sauce:
1/2 cup low sodium soy sauce
1/2 cup mirin (rice wine, similar to sherry and different from sake)
1/4 cup sake
1 Tablespoon Rice Wine Vinegar
2 Tablespoons light brown sugar
1 Teaspoon whole black peppercorns
1/2 Teaspoon sesame seeds
1/2 Teaspoon toasted sesame oil
2 cloves of garlic, pressed or minced
1" piece of ginger, grated
1. In a small heavy bottomed saucepan over medium heat, toast sesame seeds for 2 - 3 minutes.
2. Add all ingredients, bring to a gentle boil, then lower heat down to a simmer.
3. Simmer for about 30 minutes uncovered, to reduce.
4. Remove from heat and pour into a storage or serving container, straining through a sieve.
5. Brush sauce on tsukune before serving
For the tsukune (chicken meatballs):
1 3/4 lbs ground dark meat chicken, preferably chicken thighs*
1/2 yellow onion, roughly diced
1 shallot clove, roughly diced
2 garlic cloves, pressed or minced
1/4 cup shiitake mushroom caps, roughly chopped
1 jumbo egg
2 Tablespoons Mirin
1/2 cup panko
1 Tablespoon vegetable oil
soy sauce, to taste
freshly ground black pepper, to taste
1. Caramelize the onions and shallots: in a heavy bottomed saucepan over medium heat, add oil, then shallots, then onions, and a small dash of soy sauce stirring frequently.
2. After about 5 minutes, add mushrooms and black pepper. Cook until all ingredients are thoroughly cooked through and the onions and shallots leave brown residue on the bottom of the pan.
3. Add sherry to deglaze, stirring vigorously to bring the caramelized sugars up from the pan.
4. Add garlic and cook for one minute. Remove from heat, taste and adjust seasoning. Allow to cool, then pulse in a blender until the mixture forms a rough paste. About 3 pulses 3 seconds each.
5. When mix has cooled and been blended, mix all ingredients together and form the mix into meatballs.
6. Place four meatballs on each skewer. Cook on a covered grill, just indirect of the heat, for about 5 - 7 minutes at about 350. Flip skewers and cook, covered, for another 5 - 7 minutes, or until meatballs are cooked all the way through.
7. Brush with tare sauce and serve.
I hope you enjoy this recipe and I welcome your feedback!
*I ground my own chicken, using only skinless boneless chicken thighs in my Ninja blender. If you have a grinder or some way to grind up the meat I highly suggest doing so yourself.
Wednesday, January 7, 2015
Deep Dish Sausage, Spinach and Ricotta Pizza with Roasted Garlic
American Pizza is quite different from Italian pizza. American pizzerias form their pizzas with a thicker, chewier crust. Deep dish pizza, popular and readily available in Chicago, is yet a third take on pizza where chewy dough is formed into a delicious edible container for chunky sauce, enabling the pizza to be piled quite high with ingredients. I've combined ricotta, spinach and roasted garlic before (in my tortellonis); this pizza combines those ingredients with spicy Italian sausage, which makes for a decadent cold weather treat. I rendered the fat from the meatballs while searing them and used the spicy, delicious fat as the base for the pizza's sauce. You may find you've made too many meatballs for the dish; they taste great over pasta and keep in the fridge for the following night. I recommend making so many to use all of the fat rendered for the base of the sauce, and also because it is a matter of personal preference how much meat you want on your deep dish pizza. Likewise with the sauce, which will keep up to 4 days in the fridge and several months stored in a tight container in the freezer. In any case this is a very tasty combo and I hope you also enjoy it.
Deep Dish Sausage, Spinach and Ricotta Pizza with Roasted Garlic
Makes one medium sized pizza
8 ounces pizza dough
5 spicy Italian pork sausages
12 ounces baby spinach
¼ cup olive oil
8 ounces fresh mozzarella, sliced thinly
8 cloves of garlic
½ medium yellow onion, roughly chopped
¼ cup ricotta cheese
4 ounces good red wine 28 ounce can crushed tomatoes*
salt, to taste
freshly ground black pepper, to taste
Remove casings from sausages and form into small meatballs. Each sausage should make 8 - 9 meatballs.
Heat a medium sized heavy bottomed saucepan over medium heat and pour in olive oil to cover the bottom. Add sausage meatballs and sear, turning occasionally, until browned on all sides. Remove meatballs and set aside.
Add onions and salt (to taste) to the pan and cook, stirring occasionally, until the onions begin to caramelize (about 5 - 8 minutes). Crush 3 cloves of the garlic and add it to the pan. Allow to cook for one minute.
Next, pour in wine and scrape the bottom of the pan to deglaze. Add crushed tomatoes and ¼ cup water; if they’re not already seasoned with basil and oregano add ¼ teaspoon each of those also.
Bring the sauce up to a slow boil, then turn heat down all the way. Cook for 20 minutes to allow the flavors to marry. When the sauce has finished set aside to cool and eventually puree sauce.You’ll have made more sauce than you need, but it’s lovely on pasta for the next night and will keep for a few days chilled or a few months, frozen.
In a large pan saute spinach up in batches: cover the bottom of the pan in a thin layer of olive oil and a small sprinkle of salt, then place spinach in and cover with another sprinkle of salt. As the batches finish transfer the spinach to either a sieve or a cheesecloth lined bowl. When it cools, press the moisture out of the spinach.
Chop the remaining garlic into large pieces and dress with a little olive oil. Chop the mini meatballs into quarters or thirds, depending on size.
Preheat your oven to 425 degrees. Roll or stretch out dough large enough to line a 9 x 13” baking dish. Grease your baking dish, then press pizza dough into the dish and about 1 - 2” up the sides. Poke dough all over with a fork and brush olive oil all over the dough. Bake for 8 - 10 minutes.
Now we’re (finally) ready to assemble our pizza! Spread ¼ cup of the sauce over the pizza surface. Sprinkle roughly 1/4 of the meatball pieces over the pizza. Spread spinach evenly over sauce and meat. Drop teaspoon sized dollops of ricotta cheese across pizza. Sprinkle garlic pieces over pizza. Top all over with mozzarella slices. Sprinkle more chopped meatballs over the pizza.
Bake for another 10 - 12 minutes, then cut into slices and serve.
I hope you enjoy this recipe and I welcome your feedback!
*if you can find them with basil and oregano that’s the best, otherwise add ¼ teaspoon of both to the sauce when adding the canned tomatoes
Deep Dish Sausage, Spinach and Ricotta Pizza with Roasted Garlic
Makes one medium sized pizza
8 ounces pizza dough
5 spicy Italian pork sausages
12 ounces baby spinach
¼ cup olive oil
8 ounces fresh mozzarella, sliced thinly
8 cloves of garlic
½ medium yellow onion, roughly chopped
¼ cup ricotta cheese
4 ounces good red wine 28 ounce can crushed tomatoes*
salt, to taste
freshly ground black pepper, to taste
Remove casings from sausages and form into small meatballs. Each sausage should make 8 - 9 meatballs.
Heat a medium sized heavy bottomed saucepan over medium heat and pour in olive oil to cover the bottom. Add sausage meatballs and sear, turning occasionally, until browned on all sides. Remove meatballs and set aside.
Add onions and salt (to taste) to the pan and cook, stirring occasionally, until the onions begin to caramelize (about 5 - 8 minutes). Crush 3 cloves of the garlic and add it to the pan. Allow to cook for one minute.
Next, pour in wine and scrape the bottom of the pan to deglaze. Add crushed tomatoes and ¼ cup water; if they’re not already seasoned with basil and oregano add ¼ teaspoon each of those also.
Bring the sauce up to a slow boil, then turn heat down all the way. Cook for 20 minutes to allow the flavors to marry. When the sauce has finished set aside to cool and eventually puree sauce.You’ll have made more sauce than you need, but it’s lovely on pasta for the next night and will keep for a few days chilled or a few months, frozen.
In a large pan saute spinach up in batches: cover the bottom of the pan in a thin layer of olive oil and a small sprinkle of salt, then place spinach in and cover with another sprinkle of salt. As the batches finish transfer the spinach to either a sieve or a cheesecloth lined bowl. When it cools, press the moisture out of the spinach.
Chop the remaining garlic into large pieces and dress with a little olive oil. Chop the mini meatballs into quarters or thirds, depending on size.
Preheat your oven to 425 degrees. Roll or stretch out dough large enough to line a 9 x 13” baking dish. Grease your baking dish, then press pizza dough into the dish and about 1 - 2” up the sides. Poke dough all over with a fork and brush olive oil all over the dough. Bake for 8 - 10 minutes.
Now we’re (finally) ready to assemble our pizza! Spread ¼ cup of the sauce over the pizza surface. Sprinkle roughly 1/4 of the meatball pieces over the pizza. Spread spinach evenly over sauce and meat. Drop teaspoon sized dollops of ricotta cheese across pizza. Sprinkle garlic pieces over pizza. Top all over with mozzarella slices. Sprinkle more chopped meatballs over the pizza.
Bake for another 10 - 12 minutes, then cut into slices and serve.
I hope you enjoy this recipe and I welcome your feedback!
*if you can find them with basil and oregano that’s the best, otherwise add ¼ teaspoon of both to the sauce when adding the canned tomatoes
Friday, January 2, 2015
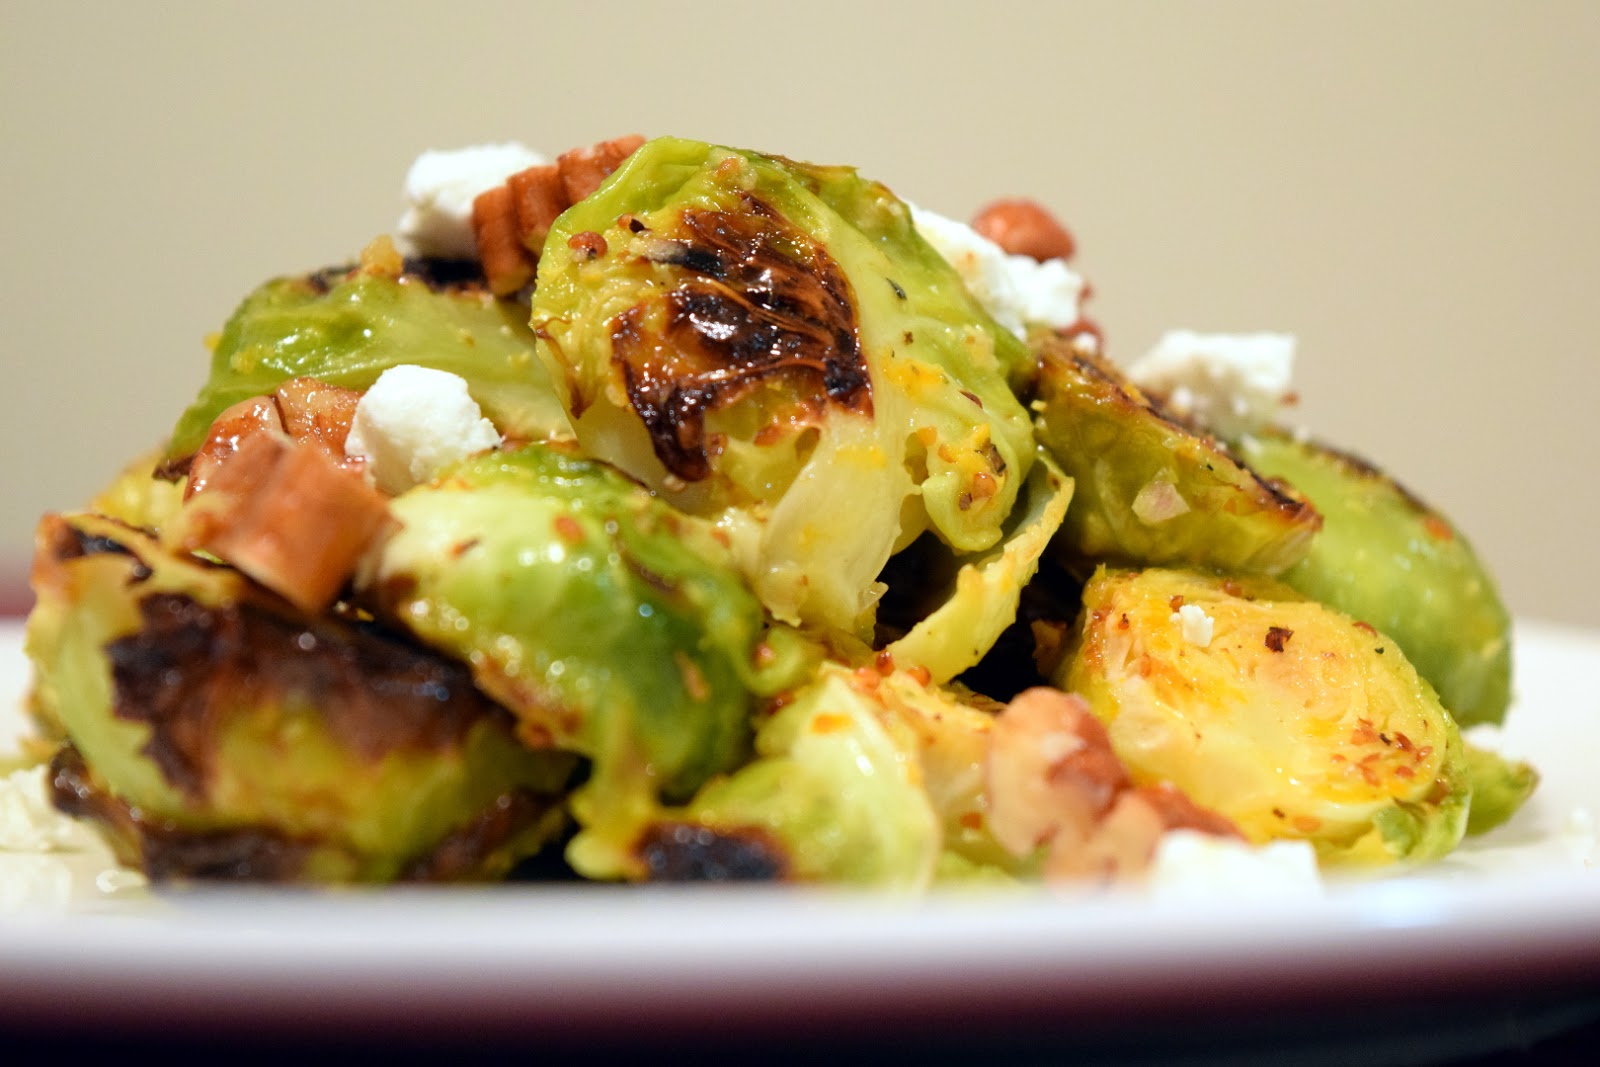
Warm Brussels Sprouts Salad with Citrus Vinaigrette, Maple Candied Pecans and Chevre
My first blog post of the new year! I hope everyone has a happy and healthy joy-filled year in 2015! This is a post about the warm brussel sprout salad I served for my Christmas dinner. How to describe this dish? Well, it's packed full of bold flavors that somehow all end up coming together harmoniously. Earthy sprouts lose some of their cabbage-y funk when roasted with orange zest and they are a perfect, slightly sweet compliment to the tangy orange-thyme vinaigrette. Maple toasted pecans add a sweet crunchy pop that perfectly compliments the mildly sharp chevre crumbles. Try it. It may make a brussel sprouts convert out of you.
The recipe makes just about twice the maple toasted pecans needed for the salad. I've doubled the amount because they make an awesome snack!
Orange Roasted Brussels Sprouts Salad w/ Orange Thyme Vinaigrette, Maple Roasted Pecans and Chevre Crumbles
Makes 4 salad bowl sized servings
2 lbs. brussel sprouts, cleaned, trimmed and cut in half
2 large naval oranges
3 Tablespoons olive oil
1 shallot clove, roughly chopped
4 sprigs thyme
1 cup pecans
3 Tablespoons chevre crumbles
2 Tablespoons maple syrup
1 Tablespoon sherry or rice wine
2 Tablespoons white wine or champagne vinegar
1/2 - 1 Tablespoon stone ground dijon mustard
salt, to taste
freshly ground black pepper, to taste
1. Preheat the oven to 375. In a mixing bowl pour the maple syrup onto the pecans and toss to coat thoroughly.
2. When oven is hot, bake pecans for 3-5 minutes. Meanwhile, zest one of the oranges into the brussel sprouts. Season sprouts with salt and pepper. Toss sprouts, zest and seasonings with 1 1/2 Tablespoons of the olive oil.
3. Set toasted pecans aside to cool. Turn the oven up to 400. Spread sprouts in a single layer on a baking sheet and bake for 15 to 20 minutes, or until the sprouts are thoroughly tender.
4. Zest the other orange and squeeze the juice from both oranges into a blender or food processor. Add shallots, remaining olive oil, stripped off thyme leaves (discard woody stems), dijon mustard, rice wine/sherry and vinegar. Season to taste with salt and pepper. Pulse in 3 second bursts until shallot has been thoroughly incorporated into the dressing.
5. Toss sprouts with dressing and sprinkle with chevre crumbles and 1/2 cup toasted pecans. Serve as a starter or side dish and enjoy.
The recipe makes just about twice the maple toasted pecans needed for the salad. I've doubled the amount because they make an awesome snack!
Orange Roasted Brussels Sprouts Salad w/ Orange Thyme Vinaigrette, Maple Roasted Pecans and Chevre Crumbles
Makes 4 salad bowl sized servings
2 lbs. brussel sprouts, cleaned, trimmed and cut in half
2 large naval oranges
3 Tablespoons olive oil
1 shallot clove, roughly chopped
4 sprigs thyme
1 cup pecans
3 Tablespoons chevre crumbles
2 Tablespoons maple syrup
1 Tablespoon sherry or rice wine
2 Tablespoons white wine or champagne vinegar
1/2 - 1 Tablespoon stone ground dijon mustard
salt, to taste
freshly ground black pepper, to taste
1. Preheat the oven to 375. In a mixing bowl pour the maple syrup onto the pecans and toss to coat thoroughly.
2. When oven is hot, bake pecans for 3-5 minutes. Meanwhile, zest one of the oranges into the brussel sprouts. Season sprouts with salt and pepper. Toss sprouts, zest and seasonings with 1 1/2 Tablespoons of the olive oil.
3. Set toasted pecans aside to cool. Turn the oven up to 400. Spread sprouts in a single layer on a baking sheet and bake for 15 to 20 minutes, or until the sprouts are thoroughly tender.
4. Zest the other orange and squeeze the juice from both oranges into a blender or food processor. Add shallots, remaining olive oil, stripped off thyme leaves (discard woody stems), dijon mustard, rice wine/sherry and vinegar. Season to taste with salt and pepper. Pulse in 3 second bursts until shallot has been thoroughly incorporated into the dressing.
5. Toss sprouts with dressing and sprinkle with chevre crumbles and 1/2 cup toasted pecans. Serve as a starter or side dish and enjoy.
Subscribe to:
Posts (Atom)


