Thursday, December 29, 2016

Linguini alla Marcella with Mozzarella

I have to share this recipe with all of you before you make your New Year’s resolutions. Why? Well, it is exquisite in its decadence, clever in its simple execution and I think everyone should taste it at least once. This pasta was introduced to me several years ago by my then roommate and food guru, who based it off of a Marcella Hazan recipe. I made it our special way many times before I learned of her influence. The recipe was initially tweaked by my roommate and I have added my own touches, most notably, the addition of melty fresh mozzarella and a tiny burst of heat to compliment the rich, sweet sauce.

Use whichever type of pasta strikes your fancy. I usually make this with spaghetti, but I had linguine on hand.

Do try to get a dark honey, such as buckwheat. Those molasses notes make an absolutely stunning addition and elevate the tart, brassy flavor of tinned tomatoes. I usually find my buckwheat or wildflower honey at farmer's markets or small specialty grocers.

Linguine alla Marcella con Mozzarella


Makes 8 servings

1 1/2 lbs pasta of choice
1 yellow onion, peeled and cut in half
8 oz. fresh mozzarella, cut into 1/2“ pieces
1 (28 oz) can crushed tomatoes
1/2 cup butter (1 stick)
1 - 2 teaspoons buckwheat (or similar) honey
Pinch of crushed red pepper
Salt, to taste
Pepper, to taste


1. In a medium pot over low flame, combine tomatoes, onion, butter and red pepper flakes. Season with salt and pepper. The sauce will need to simmer on low for 45 minutes. Stir occasionally.
2. In the last 20 minutes of cook time for the sauce add honey one teaspoon at a time, until it is as you prefer it (should be just a touch sweet, like a bursting-ly ripe cherry tomato) adjust for salt and pepper. Prepare the pasta according to the package directions.
3. Strain pasta and reserve 1/4 cup pasta water. In a large mixing bowl mix pasta, sauce, mozzarella and pasta water together.

Serve garnished with chopped flat leaf parsley.

Friday, December 23, 2016

Fruitcake French Toast

What to eat the morning after a decadent, delicious Christmas meal? It feels as though it should be special, something interesting and festive. Well, this spice packed french toast with boozey citrus maple syrup is a wonderful option for your Christmas day breakfast or brunch. And the syrup can be made ahead of time. It will keep for up to two weeks in the refrigerator. Since we don't have that much time before Christmas it will do just fine made the day before.

If you took a poll about how people feel about fruitcake it would probably--though half in jest--be described as extremely unpopular. I’ve had passable and even bad versions of fruitcake. But I’ve also had fabulous versions. Done well it is a real treat: a moist, dense spice cake with deliciously sweet and warm, fiery booze soaked candied fruit.
Since the flavors are really fabulous but the execution leaves much to be desired, I decided to try to honor the spirit of fruitcake in (hopefully) the best possible way: turning it into a moist, spicy, sweet brioche french toast topped with boozey candied orange peels accompanied by a maple orange cognac syrup.

I candied my own orange peels, a byproduct of which is orange simple syrup. If you can get them at your store just leave the orange simple syrup out. If you'd like to make your own candied orange peels, skip to the recipe at the bottom. These can be made up to two weeks ahead and stored in an airtight container.

Fruitcake French Toast

Serves 6

For the syrup:

1 cup maple syrup
1/3 cup cognac
2 Tablespoons  (approx 3/4 of an entire orange peel) candied peel, diced
1 teaspoon orange simple syrup

1. Combine all ingredients in a small, heavy bottomed saucepan over the lowest heat setting.
2. Cook for 20 minutes to infuse flavors and cook away some of the alcohol.

Serve warm over spiced brioche french toast.

For the toast:
6 thick slices stale brioche loaf
6 jumbo eggs
3/4 cup half n half
1 1/2 teaspoons vanilla bean paste
1/2 teaspoon ground cloves
1/2 teaspoon allspice
1 teaspoon cinnamon
1/2 teaspoon orange simple syrup
(Up to) 2 Tablespoons unsalted butter

1. In a bowl whisk together eggs, spices, vanilla, half n half, and syrup.
2. In a single layer soak bread slices for 2 minutes.
3. Heat a pan over medium heat. Add a small pat of butter and swirl to coat pan.
4. Flip bread and soak on opposite side for 2 minutes.
5. Shake excess egg off of bread and lay in pan. Turn heat down just a bit and fry for 5 minutes. Flip and fry for an additional 5 minutes.
Serve with Maple orange cognac syrup.

Candied orange peels

Peel of one orange, cut into long, 1/2 centimeter wide strips
1/2 cup sugar
3 Tablespoons cognac
1/2 cup simple syrup

1. Combine sugar, water and cognac in a small heavy bottomed saucepan over low heat. When sugar has dissolved, add orange peel slices.
2. Cook at a lazy simmer for 25 - 30 minutes, or until white pith turns translucent.
3. Remove peels from pan, shaking the excess liquid back in the pan.
To make orange simple syrup: strain liquid. Stored in an airtight jar in the refrigerator, it will keep for up to two weeks.

Sunday, December 18, 2016

Champagne and Elderflower Liqueur Cocktail

Tis the season to enjoy a good stiff drink or two. And I’ve got just the drink for the hectic holiday season: a strong, fancy, delicious champagne cocktail. Perhaps you can help me name it. I’m thinking some sort of play on a Bellini. How does a champagne and elderflower cocktail resemble a Bellini? Well, it also has fruit in it; a refreshing splash of ruby red grapefruit juice. What I didn’t realize when I mixed it up was that elderflower liqueur and champagne are a pretty popular combination. For good reason, as the strong, sweetly herbaceous, vaguely medicinal and liquorice notes of the liqueur are a fabulous fiery counterpoint to the light, tart effervescence of brut champagne. I found the combination to be a bit overwhelming, so I decided to add ruby red grapefruit juice. Together with vodka, elderflower liqueur and grapefruit juice are one of my favorite potent potable combinations, the reason being that the fresh, tart-sweet taste of the juice mellows out the liquorice and herbal tincture notes the perfect amount to make the two a highly enjoyable drink combination. Replacing vodka with brut champagne puts a fancy holiday twist on this scrumptious combination.

I use my homemade elderflower liqueur, but if you haven't any homemade on hand you can use St. Germaine.

Champagne and Elderflower Liqueur with Ruby Grapefruit Juice


1/2 flute (approx 2.2 ounces) brut champagne
3/4 ounce elderflower liqueur
3/4 ounce ruby red grapefruit juice

1. Fill a champagne flute halfway through with chilled brut champagne.
2. Combine juice and liqueur in a shaker over ice. Shake for a few seconds, then strain into the flute over the champagne.

Serve garnished with grapefruit twist.


Monday, December 12, 2016

Garlic & Rosemary Braised Carrots

Well, I've been away since Thanksgiving. The holidays with a toddler have been rather hectic. To make it up to my readers I'll be updating the blog with multiple posts this week. To start it off I'll be sharing a recipe from our cookbook, Foodies+ Christmas Around the World (see purchase links below). All of the proceeds are going to action against hunger. This recipe for deliciously savory braised carrots is from a good friend of mine, Lisa Watson, who blogs over at http://www.italiankiwi.com
For more great recipes, please purchase a copy of our cookbook and help support Action Against Hunger!

UK: https://www.amazon.co.uk/dp/B01M5IPAIR
US: https://www.amazon.com/dp/B01M5IPAIR
AUS: https://www.amazon.com.au/dp/B01M5IPAIR
France: https://www.amazon.fr/Foodies-Christmas-Recipes-Around-English-ebook/dp/B01M5IPAIR

(From the cookbook)

This recipe is eaten as a side dish every year at our Christmas meal in Italy. The carrots go very well with any type of main dish. They take quite a bit of time to make, but the effort is worth it. The long cooking time concentrates the sweetness of the carrots, and the final browning caramelizes them, so don’t skimp on the time needed.

You can prepare the whole recipe up to 2 days in advance and keep the carrots in the fridge, in an airtight container, until needed. They can be heated up on the stovetop on a low temperature. Stir them occasionally when reheating.

Rosemary & Garlic Braised Carrots


Timings Prep Time: 15 – 45 minutes (depending on tools used)

Cooking Time: 1½ hours Total Time needed: 2 - 3 hours

Serves 4 people

Ingredients
1 kg (2 lb 3 oz) carrots
2 sprigs rosemary
1 clove garlic
8 Tbsp olive oil
Water as needed
1 tsp salt
Instructions
Slice the carrots into rounds that are about 1 cm (½”) thick. Do not slice them too thinly, or they will fall apart when cooking. If you have a mandolin or food processor that does this for you, use it to save time. Heat the oil in a large frying pan. Add the whole clove of garlic and the whole rosemary sprigs. Cook for 1 - 2 minutes. Add the carrots and salt. Sauté them on medium-high heat for 5 minutes, stirring often. Add enough water to cover the carrots. Wait until it is simmering, and then turn the heat down to medium. Continue to cook the carrots, uncovered, for approximately 1 hour, gently stirring occasionally. If the water boils off too quickly, add more. You should be left with a bit of water in the bottom of the pan at the end of the hour. Turn the heat up to medium-high again and cook for 20 -25 minutes, until the water has boiled off and the carrots are browned. Stir often, otherwise the carrots will burn, but stir gently, otherwise they will break apart. Check seasoning, and serve immediately.

Coming up this week: an absolutely amazing champagne cocktail; later in the week a decadent breakfast dish perfect for a fancy Christmas breakfast. Stay tuned. ;)

Wednesday, November 23, 2016

Thanksgiving Feast, Part III: Peruvian Stuffing

For Part III I'm going to share a wonderful family recipe from my husband's side of the family, specifically from his aunt, Savory and sweet Peruvian sausage stuffing!


To my husband and his family this rich, zesty, sweet stuffing is the very epitome of home cooked holiday meals. This recipe for Peruvian Stuffing is straight from my husband’s tia Lilita. Ground beef and pork sausage are marinated with fragrant spices and browned with garlic and onions. It is then simmered in wine and applesauce (I highly recommend Lin’s simple applesauce under sides) and studded with raisins and crushed walnuts. Lastly it is garnished with the exceptionally popular boiled eggs. It really represents the bold yet harmonious flavours that characterize much of Peruvian cuisine. It is really a great stuffing because if your main protein dries out a bit it is the perfect side to revive it and give it lots of flavorful interest. This can also be made with turkey sausage if your family doesn't eat pork.


Peruvian Stuffing


Makes 10 servings

Prep time: 4 hours
Cook time: 40 minutes
Total time: 4 hours, 40 minutes


1 lb lean beef mince (5% or 10% fat)
1 lb pork sausage
1 tsp cumin
1 tsp garlic powder
3 Tbsp olive oil
3 cloves garlic, minced
1/2 red onion, diced
2.5 cups plain apple sauce (Lin has a simple apple sauce in Sides)
half cup white wine
1/3 cup raisins
1/2 cup crushed walnuts
3 hardboiled eggs, sliced thinly


Instructions

Remove sausages from casings.
In a large bowl, combine sausage meat, beef, cumin, garlic powder and a pinch each of salt and pepper.
Cover tightly with cling film and marinate in the fridge for 2 to 4 hours.
In a large saucepan over medium heat, add the olive oil. Saute onions until they begin to soften (5 minutes).
Add garlic and cook for an additional minute, or until garlic becomes fragrant.
Add meat and brown. This will take 10 minutes
Add wine to deglaze, scraping all the lovely bits at the bottom of the pan. If you have rendered too much fat to deglaze the pan (i.e. there is visible liquid in the meat) add the wine at this juncture and allow to cook into the meat.

Add apple sauce, bring back to simmer and cook on low heat for 15 minutes.

Add raisins and walnuts, and cook, covered, for an additional 5 minutes.

Scatter the egg slices all over and serve alongside your chosen roast.

Monday, November 21, 2016

From Scratch Green Bean Casserole

Whether you've been assigned this one dish or you're cooking an entire Thanksgiving feast there's one thing we can all agree on: we eat to excess on Thanksgiving. If that weren't enough, we eat many dishes loaded with fat, salt and other unhealthy things. In other words: flavor.


Green Bean Casserole, which is a must have at any Thanksgiving dinner, is loaded with all of that tasty stuff and more. This is because it is almost always made entirely out of cans and boxes. While this saves on time it also saves on taste. And nutritional value. But most importantly, taste. If you want to bring the most delicious, most talked about version of this dish to your thanksgiving, cook along with me and make it from scratch.


The green beans and mushroom/onion/shallot mix can both be made up to one day ahead of time. You'll simply need to cook the casserole longer (say 5 minutes) to account for the cold ingredients.


If, like me, you're cooking the entire meal, you'll still have time to make this if you prep properly. Believe it or not, it's not that much harder than the out of a can version. The most labor intensive part was chopping the green beans into little pieces. If you have the luxury of a kitchen minion or two, I'd suggest putting them on green bean chopping duty.


If this is the only dish you've signed up to bring, why not make it the best possible version?


Green Bean Casserole


Makes one 9” x 13” baking dish


32 ounces green beans, trimmed and chopped into 1” pieces


6 ounces fried onions


16 ounces sliced mushrooms


1/2 yellow onion, minced


1 large shallot, roughly chopped (about 2 Tablespoons)


32 ounces low sodium chicken stock


3 cups whole milk


4 Tablespoons butter, separated


2 Tablespoons mirin


3 Tablespoons all purpose flour


1 small pinch cayenne


1 teaspoon olive oil


1/2 teaspoon dried thyme


Salt, to taste


Pepper, to taste


1. In a large pot combine green beans and stock. Add pepper if desired. Bring to a full boil, then reduce to an active simmer. Simmer until green beans are very soft (about 20 minutes). Drain beans and set aside.
2. In a large heavy-bottomed saucepan melt 1 tablespoon of the butter along with 1 teaspoon olive oil. Saute the minced onion and chopped shallots with a pinch of salt over medium heat until caramelized ( about 10 minutes). Stir infrequently. In the last minute add thyme. When onions and shallots are browned deglaze the pan with 1 tablespoon Mirin or Sherry.
3. Preheat the oven to 350 degrees. Add mushrooms another pinch of salt and a pinch of pepper. Saute until mushrooms are cooked through. Deglaze with remaining Mirin/Sherry.
4. Set mushrooms onions and shallot mix aside. Spray or grease a large baking dish. Lay green beans in a single layer. mix in 2/3 cup by volume fried onions.
5. Melt remaining butter in the same large saucepan over low-medium heat. Add flour & cayenne and cook, stirring constantly, until the mix has turned golden. Whisk in milk, roughly 1/3 cup at a time.
6. Allow to thicken, stirring frequently. Reintroduce mushroom, onion and shallot mix. Pour milk mixture (gravy) over beans in baking dish. Bake until bubbling (about 15 minutes). Cover entire casserole with fried onions and bake for 5 additional minutes.


Serve at Thanksgiving as a side dish.


Saturday, November 19, 2016

Thanksgiving Feast Part I

Life has been hectic lately. I am planning a Thanksgiving for five and even though I know it will be far too much food there are certain dishes I simply have to bring to the table. It just won’t be Thanksgiving without them.


Even though my life has been a bit busy I still can’t seem to keep myself away from blogging. From sharing my fun in the kitchen with all of you. I think of you as my friends. And what kind of friend would I be if I left you hanging during the biggest cooking holiday in the country? You don’t have to answer that.


So, hopefully this three part series will help you up your Turkey Day game. I’ve got a lot planned for mine. Wish me luck!


If I get time for it I will be publishing a basics guide with substitutions and a glossary as part IV.


Part I: tips for the perfect mashed potatoes & how to homemake your cranberry sauce (so worth it and easy!)


As it turns out I’ve already posted about Part I. Here’s my post from two years ago.


Part II is going to consist of from-scratch green bean casserole, so stay tuned!


Bonus pic of my mashed potatoes:


Thursday, October 6, 2016

Perfect Poached Salmon (Slow Cooker)

I love salmon. Bake with a spice rub or pan fried with a glaze or marinade. For some reason I had not considered poaching it. I’ve recently tried it with some lovely aromatics and it has definitely made me a convert! I use the poached salmon to make a stunning salmon mayonnaise salad, but you can easily consume it by itself, or with rice. It really does make for a delightful salmon salad and because of this I’ll include the proportions below.

What makes this salmon so amazing? Well, for one it is fork tender. And the aromatics I used (lime, ginger, cumin and cardamon) lend a delightfully subtle something that utterly infuses the salmon in a much more complete way than a glaze or spice rub can manage.

What’s more is it is made easily in your slow cooker.

Poached Salmon


2 (5 -6 ounce salmon fillets)
1 1/2 inch piece of ginger, peeled
1 tsp cumin
1 tsp cardamom
1 lime
2 tablespoons mirin
Salt, to taste
Pepper, to taste

1. To a crock pot add 1 1/4 cups water & the mirin. Set slow cooker on high for 30 minutes.
2. Add lime, cumin, cardamom, salt, pepper and salmon. Set on high for another 30 minutes.
Remove from water, rub the excess fat off and serve.


To make into salmon salad: approx 2 Tbsp mayonnaise and 1 tsp stone ground mustard per fillet. Chopped celery optional.

Monday, September 26, 2016

Ham and Cheese Frittata

I originally wanted to call this Denver Frittata. Partly to amuse myself and partly because, finding myself with extra of the ingredients needed to make a classic denver omelet, I instead planned a frittata. A denver omelet is popular with restaurant goers (and therefore a common menu item at diners) because its simple, straightforward combination of ham, green peppers and cheese (often cheddar) plays very well together. Sauteed peppers offer a sweet and vaguely sour counterpoint to the fatty, salty and sweet crisped ham while cheddar offers a slight tangy, rich sharpness in the background.


Why a frittata? Well, to be honest I thought I knew what a frittata was for many years and as I learned from my friend Lisa, the blogger at Italian Kiwi, I was wrong. I’d been applying that term to any crustless egg pie, baked or fried. The problem is that frittata literally means “fried”. Not only is it fried, it is also composed of an aerated egg batter which has been vigorously whipped. The resulting fluffy egg pie seems so simple, yet is difficult to master. So I decided to make a frittata partly to practice my technique. As to the other part of my motivation? Fried fluffy savory egg pies are delicious.


Denver Frittata

Makes 1 (8 in) pie

4 jumbo eggs
1 ounce sharp cheddar, finely grated
1 ounce ham, diced
1/2 large green bell pepper, diced
1/4 cup neutral oil (divided)
Salt, to taste
Pepper, to taste

1. Whisk eggs together with the cheese and season with salt & pepper.
2. In a medium sized skillet or heavy bottomed saucepan (cast iron is best) , heat 3 Tablespoons oil. Over medium heat, saute the ham and peppers until peppers are soft and the ham has been seared all over (6 minutes).
3. While the peppers and ham saute, whip the eggs quickly and with great force. You will notice bubbles begin to form, then the egg batter will start to increase in volume.
4. Distribute the ham and peppers evenly across the bottom of the skillet and pour egg batter over them. Fry for five minutes and leave the frittata alone. No flipping or stirring necessary. If you’re worried it will burn, make sure you check for smoke or a burnt smell frequently and adjust heat as needed.
5. Slide a plate over your pan and carefully invert the pan onto the plate. Thump gently to loosen the frittata. It should come off mostly or all in one piece.
6. Return pan to the heat and add the remaining 1 Tablespoon oil. Slide the frittata back into the pan and allow it to finish cooking for 3 minutes.
Transfer to a paper towel lined plate and serve.


Thursday, September 22, 2016

Roasted Spice and Vanilla Applesauce

A lot of the recipes I write these days are inspired by my son Henry. He’s almost a year old now and well into solids. Although it takes a bit of extra work there is nothing more satisfying than feeding your child homemade fruit sauce. And this version is by far the best applesauce I have ever had. Roasting helps to gently caramelize the apples and brings the spices satisfyingly to the fore. It is a lot of work, but you can easily make a double or triple batch as this applesauce can be canned, bottled or frozen. It will also keep in the refrigerator in a tightly covered container for up to 10 days.

Roasted Spice and Vanilla Applesauce


Makes approx 2 cups

4 gala apples, cored and quartered
1/4 tsp allspice
1/4 tsp ground cloves
1/2 tsp cinnamon
1/2 Tbsp sugar
1 1/2 tsp vanilla bean paste
A touch of salt

1. Preheat oven to 375F. Toss apples with vanilla, then lay them in a single layer on a greased baking sheet. Sprinkle apples with sugar and all of the spices, then just a touch of salt.
2. Bake for 35 minutes, or until apples are falling apart.
3. When they are cool enough to handle, peel skins away and discard. Pulse fruit in the blender with 2 ounces of water, until smooth.
Serve warm or store, covered, in the refrigerator.

Friday, September 16, 2016

Leftover Shakshuka with Potatoes

Shakshuka. Say it with me Shak (Shahk). Shuka (Shookah). What is it? A fabulously flavorful, spicy, easy egg dish from Israel that can be eaten for breakfast, lunch *or* dinner. Eggs are poached in a zesty tomato and vegetable sauce and it is usually served with warm, fresh pita or crusty bread. I’ve known I wanted to try it since I first heard of it on Cutthroat kitchen. The camera closeup was of a cast iron pan filled with a chunky red sauce and dotted with perfectly poached eggs; I was intrigued.
After cooking a friend’s excellent recipe for Croatian Chicken Paprikash I was left with a lot of the wonderful sauce (through no fault of the recipe; I just fudged the amount of chicken to use since I like to use a different cut in my stews than her recipe recommends). I couldn’t bear to throw out so much excellent, savory flavor so I decided to add just a few ingredients and turn it into Shakshuka. I added potatoes to my Paprikash and they were full of flavor; a great starch for the Shakshuka. If you make Chicken Paprikash on Friday you can plan on incorporating the leftover sauce into a Shakshuka on Saturday morning for an easy, delicious breakfast. If you like egg dishes and savory breakfast, I highly recommend trying Shakshuka.

Shakshuka


Serves 3

1 quart leftover sauce from Chicken Paprikash*
2 (15 ounce) cans chopped tomatoes
6 eggs
2 teaspoons cumin
Salt, to taste
Pepper, to taste

Garnish:
Chopped Italian Parsley
Feta Cheese

1. In a broad saucepan combine Paprikash sauce, cumin and chopped tomatoes. Bring to a lazy boil over medium heat and cook for 10 - 15 minutes, to thicken sauce.
2. Crack eggs in one by one, up to five around the edges of the pan and one in the center. Cover, reduce heat to low and cook for 2 - 3 minutes for poached eggs and up to 10 minutes for hard boiled eggs.
Serve garnished with generous helpings of minced parsley and feta cheese.


*I like to add potatoes to my chicken paprikash. 2 large russet potatoes, scrubbed and chopped into roughly 1” pieces; they go into the stew when the liquid does.

Wednesday, August 31, 2016

Ginger Lentils & Balsamic Roasted Butternut Squash

Sometimes, inspiration is found in odd places. This dish was adapted from a recipe by Martha Rose Shulman published in the New York Times with a few added tweaks of my own. However, it was my son’s baby food that actually inspired this meal. I make him a lot of food, but I sometimes need a quick food on the go and so I have a particular brand of purees I love, especially their world baby line, with wonderful and exotic food combinations. Their Moroccan puree is lentils with roasted butternut squash and apricots. It sounded so yummy to me that I began to devise a grown up version of the dish.

Ginger is an absolute game changer for lentils, heightening the sweetness of the legume. The fiery spice of ginger is buffered perfectly by the starchy, dense lentils and mellowed out to a low flame in the background. I only had ground ginger (I know, I know, but life is busy with an infant), but I intend to try it with fresh ginger as well, so I’ve put down the amount I’ll be using.

I served this alongside a modified, vegetarian version of Tyler Florence’s Apricot Couscous

The two recipes together make a healthy, filling weeknight meal, particularly when you’re in the mood for lighter, meatless fare.

Lentils & Roasted Squash


Serves 8 - 10

1 lb lentils, rinsed & picked through
20 ounces peeled, cubed butternut squash
1 1/2 Tablespoons olive oil
1 1/2 Tablespoons balsamic vinegar
1 bay leaf
1 teaspoon ground ginger, or 1” piece fresh ginger, peeled and sliced thinly
1 half an onion, coarsely chopped
1 shallot, chopped
Salt, generously, to taste
Pepper, to taste
(for garnish): 1 Tablespoon minced cilantro & 1 Tablespoon minced Italian Parsley

1. In a large pan over medium heat combine 1/2 gallon of water with all ingredients except for the vinegar, squash & olive oil.
2. Bring to a simmer, cover and cook for 60 minutes, or until lentils are almost thoroughly soft (some should still be slightly crunchy).
3. Preheat oven to 375 degrees. Place a sieve over a bowl and strain the lentils through. Retain the broth.
4. Mix broth with vinegar, olive oil and a touch more salt and pepper. Toss squash into broth/vinegar mixture and coat thoroughly.
5. Bake until cooked through, 50 - 60 minutes, depending on cube size.
6. Reintroduce broth to lentils in the pan, add squash and cook for an additional 20 to 30 minutes, or until lentils have reached desired consistency.

Serve garnished with cilantro and parsley and alongside apricot couscous.

Saturday, August 20, 2016

Pepper Biscuits and White Sausage Gravy

This post is inspired by one of my favorite concepts: breakfast for dinner. Growing up we would often get breakfast for dinner as a special treat. It usually meant eggs and some kind of vehicle for New York’s spectacular maple syrup (my mom’s banana walnut and blueberry pancakes stand out as favorites). I usually enjoy savory fare for breakfast, especially given the price of real maple syrup here on the West coast. So, instead of trying out pancakes or french toast I’ve decided to add one of my favorite breakfasts to our menu: biscuits and gravy with a perfectly fried egg. While visiting my badass ship captain/carpenter/former lobsterman sister in Maine we stopped in at a little diner in Portland. As we approached the diner I could smell the wonderful aroma of sausage gravy and I had a feeling I was about to encounter a popular American classic: biscuits and gravy. It was indeed on the menu and it was absolutely delicious! Soft, fluffy New England style biscuits made a perfect vehicle for luscious, flavorful sausage gravy. Rich, runny egg yolk from a perfectly over-medium fried egg brought the combination together in a decadent, mouthwatering way.

I’ve been thinking about putting breakfast for dinner on my weekly menu ever since I planned a weekly menu for a good friend of mine who daily cooks dinner for her husband and two young daughters. We’ll call her R. I feel pretty harried cruising the aisles of the grocery store with just one cute little wriggler, much less two, so I try to plan the menu for the entire week and buy most of my groceries in one trip. This is an entirely new experience for me, as I previously mainly cooked to develop recipes for the blog. When I became a mom I was suddenly filled with the yearning to make us a home cooked meal every night. Aside from playing with my son and watching him learn and grow, prepping and cooking dinner for my family has been the most fun and rewarding part of my day.

My friend R, who made spectacular stuffed mushrooms for a recent dinner we had together, is rather modest about her cooking abilities. She mentioned that coming up with a new idea every night for dinner was probably the hardest part about cooking for a family. I mentioned my weekly menus and infrequent grocery store trips. I offered to write one for her family and she accepted. This weekly menu presented some unique challenges: she is vegetarian; her husband is not. They both eat eggs so as a way to bridge the gap and make cooking easier on her I suggested breakfast for dinner for one night of the week.

The gravy is lovely as a stand alone. White sausage gravy is creamy and tastes quite a bit more rich than it actually is. Sauteed onions make it sweet and it is kept from being too boring by the addition of bitter, lightly herbaceous celery and sweet thyme. If you’re wondering how they come together I sift the dry biscuit ingredients, then make the gravy, preheat the oven and stick the gravy pan on the back of the stove (next to the oven vent) to keep it warm as I finish getting the biscuits together.


Black Pepper Biscuits


Makes one dozen

2 1/2 cups all purpose flour
4 Tbsp cold, unsalted butter, cut into small cubes
1 tsp salt
3 tsps baking powder
1/2 cup 2% milk
1/2 cup buttermilk
Generous pinch of freshly ground pepper

1. Preheat oven to 350. Sift together dry ingredients (including pepper).
2. With your fingers, add butter: delicately pinch it with the flower between your fingers, until dough begins to resemble large, soft sand.
3. Add milk and buttermilk and mix gently until they have been incorporated. Stop mixing the instant the dough no longer feels wet.
4. Using your hands, break off 1/4 of the dough mixture. Roll gently, then flatten into a roughly circular shape roughly 1” thick. From the dough use a circular cutter or the mouth of a glass to cut out three biscuits.
5. Repeat with remaining portions of dough until all the biscuits have been cut out.
6. Spread biscuits out onto an ungreased cookie sheet and bake for 20 - 22 minutes, or until cooked through. Be careful not to overcook.

Serve warm smothered in white sausage gravy.

White Sausage Gravy


Makes 10 - 12 servings

4 pork sausages (preferably bratwursts)
3 cups milk
3 Tbsp flour
3 Tbsp unsalted butter
1 Tbsp olive oil
2 stalks celery, diced
1/2 medium yellow onion, diced
1/2 cup beer (or whatever you prefer to use to deglaze)
1/4 teaspoon cayenne
1/2 teaspoon dried thyme leaves
Salt, to taste
Pepper, generously, to taste

1. Heat a large, heavy bottomed saucepan over medium-high heat and add olive oil. Remove sausage casings, add the meat to the pan and crumble it up. Add pepper.
2. Sear sausage meat and when it is fully cooked through, (about 10 minutes) remove it from the pan and set aside, leaving the fat that has been rendered in the pan.
3. Add celery, onion and thyme and saute over medium heat until the vegetables are cooked through (roughly 5 - 7 minutes). Set vegetables aside with sausage.
4. Turn heat down slightly and melt butter, then add flour and cayenne. Cook, stirring near-constantly, until the flour turns golden. Deglaze pan with beer.
5. Turn heat to low and whisk in milk. Cook for five minutes, then reintroduce sausage and veggies and when everything is warmed through turn off heat. Gravy will thicken upon standing and will loosen the warmer it gets..
Serve gravy over biscuits and accompanied by eggs fried over medium.


Sunday, July 24, 2016

The Hound: Vodka Grapefruit with homemade Elderflower Liqueur

It’s been awhile since I’ve blogged about a cocktail, and I'm posting today with a drink that will chase away your Monday blues. This summer foodies plus’ how about a drink event has really inspired me. I’ve concocted a mock-tail or two; now I’m inspired to recreate an exceptional drink I enjoyed in San Francisco one New Year’s Eve. It was several years ago now, but the drink was so delicious I’ve always intended to get my hands on the ingredients and enjoy it at home.
The bar I imbibed at called the drink The Hound, (which I assume is a play on a Grayhound: vodka with grapefruit juice) but I later learned it could be called a Bichon Frise. Since it was called The Hound when I tried it and as a nod to Game of Thrones, I’ll keep the name. In order to make this cocktail I decided to make my own Elderflower Liqueur. I had fun designing a label for it in publisher, but not half as much fun as I had enjoying the drink! The drink is a bit strong, so if you want to mellow it out a bit my suggestion is to add a few ounces of club soda.

Why go to the trouble of making my own liqueur and hand squeezing grapefruits? Vodka and grapefruit juice, particularly fresh squeezed, are a really nice match, taste wise. The sweet and tart fruit has so much personality and it is a lovely pairing with the exceptionally subtle fire of vodka. Grapefruit juice tastes juicier and more vibrantly citrusy when paired with the sweetly medicinal, herbaceous flavors of Elderflower liqueur. But you don’t have to take my word for it. Give it a try. I think it may just become one of your favorites.

It is not difficult to make liquor infusions and easy enough to turn them into liqueurs (just add the right amount of sugar), and they make great gifts for your fellow booze loving foodie. However, elderflower liqueur is also readily available in stores.

The Hound


(Makes 2 cocktails)

2 ounces elderflower liqueur (see recipe below)
4 ounces vodka
Juice of 2 large ruby red grapefruits

1. Mix all ingredients in a cocktail shaker with ice and drain into martini glasses. If this is too strong, strain into a highball glass and add up to 3 ounces of club soda.

Elderflower Liqueur


1/4 cup dried or 2 to 3 Tablespoons fresh elderflower flowers, leaves and stems
1/4 cup sugar
750 mils 100 proof vodka (or another similarly neutral spirit of about the same proof)

1. In a clean mason jar combine all ingredients. Screw the lid on tight and shake the ingredients well.
2. Set in a cool, dark place to allow to steep for three days. Shake one to two times per day.
3. Strain through a coffee filter to remove all sediment and use in cocktails.

Friday, July 8, 2016

Grilled Salmon with Spicy Teriyaki Glaze

For those of us with lovely early summertime weather it is easy to want to spend all day outdoors. If not all day, then at least enough time to cook dinner over a charcoal grill and perhaps enjoy a beer or two. Whether you call it grilling or barbecuing I’m sure you would agree that not only is it a relaxing way to cook, it is also a fabulous method for imparting maximum flavor to your food. Over the summer I grill my onions alongside my burgers to make a deliciously caramelized topping. I’ve been known to grill corn, zucchini, asparagus and even peaches, as well as many different types of meat skewers. Although I’ve made this salmon dish many times before I’ve always pan seared it and never really thought of grilling it. Until I smelled all the grills going in our little neighborhood and realized that charcoal and a well-seasoned grill impart a smoky, savory flavor that would perfectly compliment the sweet, salty and zesty glaze I had created. At the end of reducing the teriyaki I like to throw in the juice of one or two limes (depending on size); because the glaze is rather sweet they cut the flavor just enough without being sour, and add a fresh, citrusy note that completes the flavors of the dish.

I like to serve this with brown rice and haricot verts sauteed with garlic, mirin and soy sauce.

Grilled Salmon with Spicy Teriyaki Glaze


Serves 2

1 1/4 lbs salmon, portioned into two fillets.
1/2 Tablespoon olive oil
Pepper, to taste

Sauce:

1/4 cup brown sugar
1/4 cup soy sauce
Juice of 1-2 limes (about 3 Tablespoons’ worth)
1/2 teaspoon sriracha or hot sauce of choice
1/4 teaspoon freshly ground black or white pepper

1. Premake the sauce: combine all ingredients, except for the lime juice in a small saucepan over low heat. As sugar melts, stir frequently. Bring the pan down to the lowest heat and reduce for about 15 minutes, or until it has reduced by half.
2. Rinse the salmon thoroughly under cold water and pat dry. Cover both with olive oil and season with pepper. Grill the salmon, skin side down on a covered grill, over medium indirect heat for 3 minutes. Flip, recover and cook for an additional 3 minutes. This will yield salmon which is medium rare. If you want it more medium or well done, add 1 minute per side.
3. If sauce has cooled, reheat it before finishing it with lime juice. Divide between the two fillets and serve.

Friday, June 10, 2016

Garlic Fried Rice with Char Siu

Sometimes there’s an easy recipe you keep on hand for when days get hectic. Having a sixth month old to care for and now to cook for, I am finally starting to really understand the meaning of the word! At any rate, this flavorful dish is a great way to use up leftover rice. If you don’t have Char Siu, visit my recipe to homemake some here
Perhaps you’d like to make a vegetarian version. In that case, leave out the pork fat and use butter in place of it on a 1:1 ratio.

What really makes this dish wonderful--aside from the bittersweet, spicy earthiness of garlic--is how adaptable it is. You can add any vegetable you like to it, for example. Or no vegetables, if that’s how you roll. Listed below are my recommended ingredients and for variety’s sake. If you want to get fancy and you have a can of water chestnuts or sliced bamboo shoots, they would also be tasty tossed in.

Garlic Fried Rice with Char Siu


Serves 4

2 cups cooked rice
5 scallions, sliced (white and pale green parts only)
1 carrot, julienned
2 stalks celery, julienned
1 ounce bean sprouts (optional)
1 slab char siu, (approx 1/4 inch thick), diced finely
2 cloves garlic, minced
2 eggs, beaten
1 Tablespoon neutral oil (such as safflower, vegetable, canola or peanut oil)
1 1/2 Tablespoons pork fat (rendered from the char siu)
Soy sauce, to taste
Pepper, to taste

1. In a wok or heavy bottomed saucepan over medium, heat 1 the oil. Beat the eggs for a minute or so to incorporate more air and then add them to the pan. Tilt pan as you would when forming a crepe to make a thin pancake of egg. Cook 2 -3 minutes, then flip. Cook until eggs are cooked through. Set aside to cool.
2. When eggs have cooled, sliced them into 1/4 inch strips.
3. In the pan over medium heat, add pork fat, then carrots, scallions, char siu and celery. Season with pepper. Cook 3 minutes, until vegetables are beginning to get tender.
4. Add garlic and bean sprouts and a dash of soy sauce and cook for an additional minute.
5. Add rice and more soy sauce, up to 1/2 teaspoon and more black pepper. Cook until rice is heated through.
6. Add egg and cook until egg had been heated, up to 1 minute.
Serve, garnished with additional scallions.

Thursday, May 19, 2016

Roasted Zucchini & Parmesan Arancini (fried rice balls)

Traditional arancini is one of the dishes in my “next 100 ideas” post. Why? Because fried rice balls with savory ground beef and pea filling in tomato gravy is just amazing. And I’m definitely going to share a traditional arancini recipe one of these days. However, zucchini are just coming into season, which gives this recipe precedence. Also, it was really fabulously tasty and I highly recommend trying it right away. You might compare these small bites to crispy yet also creamy risotto fritters. As for the taste: sharp, nutty and delectably meltable parmesan was a glorious counterpoint to sweet, caramelized zucchini and starchy rice. And the crunchy outside! Wow.

These rice balls were easier to keep together when they were cold, so if you notice them start to fall apart as you handle them, put them in the fridge or freezer for a bit before dipping them in egg wash and breadcrumb.

Zucchini & Parmesan Arancini

Yield: 12 - 16 (depending on size)


1 1/2 cups cooked short grain white rice
2 zucchini, sliced lengthwise to matchstick length (1/8 inch)
3 ounces finely grated parmesan
1 egg, beaten
3/4 cup breadcrumbs
1/2 teaspoon olive oil
Salt, to taste
Pepper, to taste
Oil, for frying (any neutral oil, such as vegetable or peanut)

1. Preheat oven to 400. Toss sliced zucchini with olive oil and season with salt and pepper. Lay zucchini in a single layer on a cookie sheet and then roast until soft, about 12 minutes.
2. Allow zucchini to cool, then dice and mix with rice and cheese. Season with salt and pepper. Form arancini into small balls and press firmly to compact. If they are too warm after handling cool them down.
3. Fill a small pot with about 1” of oil and heat over medium flame. Dip arancini in egg, then roll in breadcrumbs. Lay arancini in a single layer in oil and cook until the underside has become golden brown, 3 - 5 minutes, depending on size of fritter.
4. Flip and cook an additional 3 - 4 minutes.
Serve warm

Monday, May 9, 2016

Lentil & Bacon Stew with Italian Parsley

Split pea soup, an American institution, is nearly always made with ham. It is actually a really lovely pairing, with the salty, fatty meat enhancing the sweet earthy nuttiness of the peas. That is, if you like ham. I’m not a huge fan of ham, although I love pork loin, belly, shoulder and of course, bacon. As well I’ve always preferred green or brown lentils to split peas. There’s just something about that subtle combination of sweet and bitter; it’s almost clean like a good sweet mountain well water. I’m happy to eat lentils on their own or with a few chopped carrots tossed in, but one day I pondered adding something more. Something more conventionally sexy like...bacon! Bacon works as well with lentils as ham does with split peas. A really great pairing. As lentils are a bit on the sweet side and I like a bit of bitter with bacon’s salty, fatty smoky goodness I hit upon delicately bitter parsley. The three ingredients make a great combination.

I like to serve this soup with my smoked trout salad from the previous post. It freezes really well (I use a muffin tin and plastic wrap to freeze individual portions of
it) so it makes a really fabulous quick dinner when paired with a sandwich or salad.

Lentil & Bacon Stew with Italian Parsley


Makes approximately 10 bowls

3 slices thick cut bacon, chopped into 1/2 inch pieces
16 ounces green lentils, rinsed & picked through
~2 Tablespoons olive oil (enough to cover the bottom of cooking vessel)
500 grams (about 1.5 cups) mirepoix (from about 3 small carrots, 2 stalks celery & 1 medium yellow onion
1 shallot, chopped
75 grams (about 1/4 bunch) Italian Parsley leaves & stems, roughly chopped
1/2 teaspoon thyme leaves
1 bay leaf
Pepper, to taste
Salt, to taste

1. Heat a heavy bottomed stock pot over medium heat, then add oil to cover the bottom. Add bacon and cook until bacon begins to crisp and fat has rendered.
2. Add mirepoix, shallots and a pinch of pepper and saute for 4 minutes, or until onions are starting to caramelize.
3. Add parsley, bay leaf and thyme and cook for another 2 - 3 minutes, or until you start to smell thyme.
4. Add lentils and 10 cups water. Bring stew to a boil, then reduce heat to low and bring to a simmer. Simmer for 50 - 60 minutes, stirring occasionally. As the lentils begin to soften, use the back of your stirring utensil to gently mash the lentils in the pot. This will release some more of their flavor into the broth as well as thickening it.
5. When the broth has reduced slightly and the lentils are fully cooked, take stew off heat and serve. Salad or sandwich optional.

Tuesday, April 19, 2016

Smoked Trout Salad with Citrus Vinaigrette

This simple salad is favorite in our house. Why? Well, for one tinned smoked trout keeps practically indefinitely and is absolutely packed with flavor. In fact, it has become a pantry staple. The sweet, tart, bright and earthy citrus and tangy spicy mustard dressing compliments the smoky, salty fish in a wonderful way. These flavors are given the occasional wonderfully surprising pop from the odd fresh herb snippet in the salad mix. If you don’t have a supermarket nearby that offers an herb salad mix I’ve included a note below with suggestions on how to construct it. It really makes a difference in this recipe and is fairly simple, especially for those of us with herb gardens. I usually serve this salad with a homemade lentil soup, such as my lentil, bacon and Italian parsley soup (the recipe for which will be the subject of my next post)

Smoked Trout Salad with Citrus Vinaigrette


For the salad:
1 ounce sliced almonds
(1) 8 ounce bag herb salad mix*
5 ounces smoked tinned trout in oil, drained & oil set aside (see dressing ingredients)

For the dressing:
Zest & Juice of 1 orange
1 Tablespoon oil from smoked trout
1/2 teaspoon thyme leaves
1 Tablespoon olive oil
1/2 teaspoon thyme leaves
1/2 Tablespoon mirin or sherry
1 shallot, roughly chopped
2 Tablespoons dijon or stone ground mustard
Salt, to taste
Pepper, generously, to taste

1. Blend all dressing ingredients until smooth.
2. In the bottom of your large salad bowl flake trout finely.
3. Lay salad over fish, drizzle on dressing and toss to combine.
4. Sprinkle almond slices over the salad and serve.

*Alternatively (if you can’t find herb salad mix) 8 ounces of baby greens or spring mix and 3 - 4 very small sprigs each of Italian Parsley, Cilantro & Dill will do nicely

Wednesday, March 30, 2016

Sauteed Shrimp with Bean Sprouts Braised in Shrimp & Black Pepper Fume


My grandparents and I used to frequent a small sushi restaurant in Manhattan. There was a dish on the menu I had never seen, seemingly simple and yet so packed with flavor as to set the idea of simple cooked bean sprouts on its head. At first I couldn’t place the rich, vaguely sweet and mildly brackish flavor the chef braised the sprouts in to give them such an addicting quality. It wasn’t until one day when we asked them to make it with shrimp that I finally understood the flavors matched, more or less. The quality that gave them their amazing taste was a concentrated shrimp stock; a fume. Sweet and spicy black pepper plays up to the sweetness in the shrimp and complements it in a delightful way. Mildly onion-y and earthy spring onions helped complete the flavor profile.

In this post I’ll try to recreate this dish. Because I loved it with sauteed shrimp I’ve added shrimp. This will help make it more substantial. Get the best shrimp you can, sushi grade, if possible. This dish has so few ingredients they need to be the best of the best.

Sauteed Shrimp with Bean Sprouts Braised in Shrimp & Black Pepper Fume


Makes 4 large servings

12 ounces unpeeled shrimp
1/4 teaspoon freshly ground black pepper
3 ounces bean sprouts
3 spring onions
1/4 teaspoon sesame oil
1 Tablespoon neutral oil
Soy sauce, to taste

1. Clean spring onions and chop off the dark green papery upper portions and set aside. Cut the rest into 1 inch segments.
2. Remove heads from shrimp and devein without removing the shells or legs (slice along back of shell to remove veins).
3. In a wok heated to medium high heat, add half the neutral oil, a small dash of soy sauce and a small pinch of pepper & saute shrimp in shells until just cooked through, about 3 minutes per side. Remove shrimp from heat and set aside to cool.
4. When shrimp are cool enough to handle, remove peels and legs. Add shrimp heads, peels, legs & green papery parts of spring onions to wok over medium heat. To this add sesame oil, 2 cups of water, more soy sauce (to taste) and remainder of pepper.
5. Bring to a gentle simmer and reduce for approximately 30 - 45 minutes (depending upon how much time you have to devote to dinner). Strain stock into a bowl and set aside.
6. Add the remaining oil to the wok and saute the green onions until they begin to soften and caramelize, about 3 minutes. Flip the onions over and saute for another 3 minutes, add bean sprouts and after 1 minute, stock. Cook for another 6 or so minutes, until the sprouts are cooked through completely. In the lastinute, reintroduce the shrimp.

Serve alongside rice or make it an accompanying hot dish the next time you make sushi at home.

Wednesday, March 16, 2016

100 ideas for the next 100 blog posts!

So, below is a complete list of the 100 ideas I've thought of that could be next for the blog, as mentioned in the previous post. I'll admit some of them may be rather challenging and some too simple, so I'd love to hear your thoughts, dear readers. Anything you'd like to see go up sooner rather than later?

You may recognize a couple of them from the previous post.


1. tiramisu cupcakes
2. char siu & roasted broccolini congee
3. venison, wine & berry gravy
4. homemade gnocchi in gorgonzola sauce
5. moist apple ginger spice bread
6. five spice roasted pork belly
7. smoked trout salad with citrus vinaigrette
8. molasses & black garlic teriyaki sauce
9. peach, ginger & black tea jam
10. lychee, raspberry & jasmine tea spread
11. french toast casserole sticks
12. spicy beef mac n cheese bites
13. spicy soy & honey glazed salmon
14. layered veggie baked ziti
15. pan fried garlic chicken
16. best fruitcake
17. niku dango
18. avocado toast with miso aoli
19. spicy sausage and cabbage in cream sauce
20. german potato salad
21. gourmet hot dish (Greek style)
22. choux pastry waffles
23. traditional aji de gallina
24. linguini alla vongole
25. authentic Italian meatballs
26. minestrone
27. bubble and squeak croquettes
28. chicken cacciatore
29. curry bi hon
30. budin azteca
31. enchiladas de jaiba
32. guava filled churros with lime glaze
33. bean sprouts sauteed in shrimp dashi with black pepper
34. butternut squash ravioli in brown butter with gingersnap sand
35. White peach, arugula & smoked mozzarella pizza
36. french peas with escarole
37. mom’s perfect zucchini bread
38. grandma’s zesty roast chicken
39. mexican style sloppy joe’s
40. quick pickled red onions
41. pickled cauliflower
42. brussels sprouts, chevre, walnut and sherry caramelized shallot turnovers
43. bagna cauda
44. crispy pan fried trout hollandaise with haricot vert
45. chicken katsu w/ pineapple teriyaki sauce
46. mom’s tofu pot pie
47. okonomiyaki
48. pan seared salmon, balsamic reduction and baby leeks in cream
49. maple candied bacon and salted peanut donuts with maple sugar glaze
50. turkey, root vegetable & white bean soup
51. honey candied apricot tsimmes
52. stuffed cabbage
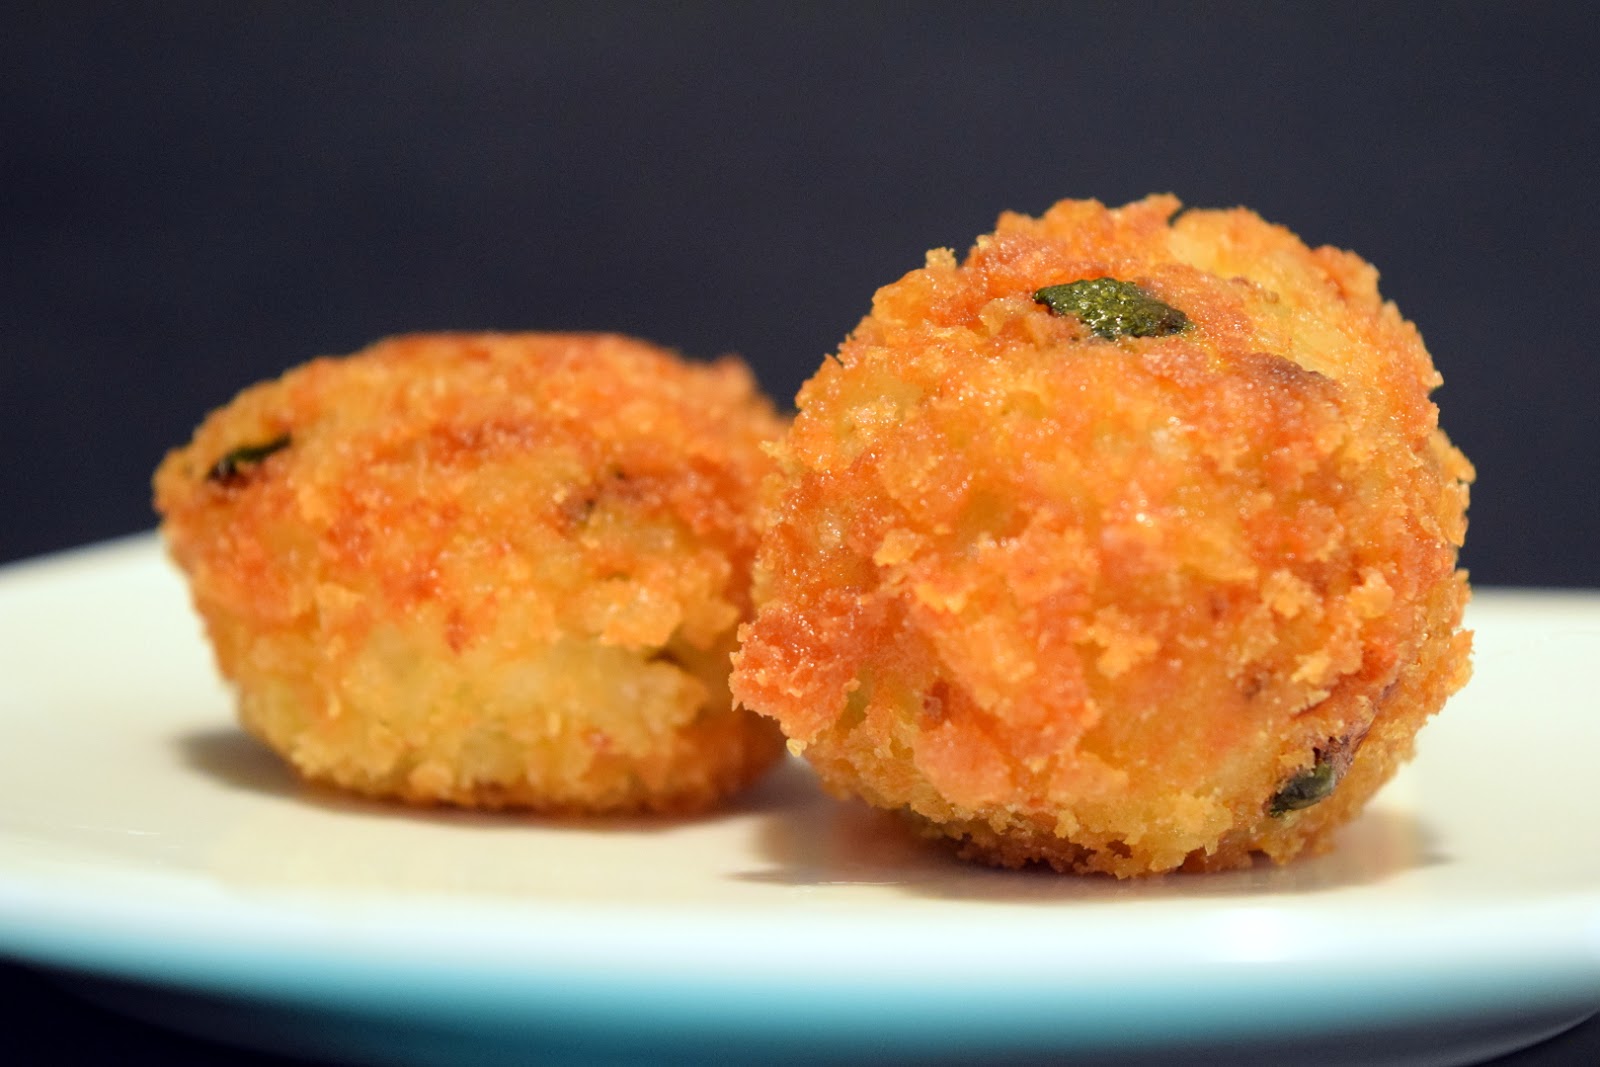
53. Italian style lasagne
54. traditional arancini
55. matzoh ball soup
56. garlic fried rice
57. peanut butter cookie cups
58. takoyaki
59. flat bean and zucchini squash soup
60. coq au vin
61. cheesy roasted mushroom veggie burger
62. aji y pesacado causa
63. lomo saltado
64. cheddar stuffed soft pretzels
65. artichoke eggs benedict
66. shrimp al arrabiata
67. Linguini alla marcella with mozarella
68. shrimp grand marinier
69. pork sticky rice
70. coconut milk khao soi “soup”
71. garlic miso tonkatsu
72. scallion pancakes
73. pad see ew
74. crab samosas
75. burmese glass noodle salad
76. banana nutella french toast casserole
77. potato latkes with roasted apple sauce
78. whiskey & pheasant sausage
79. boudin
80. chicken apple sausage
81. moroccan chicken tagine
82. gulab jamun
83. lobster chowder
84. cioppino with roasted fennel & tomatoes
85. lamb chops with berry jam glaze
86. chicken & baby bok choy with white garlic sauce
87. new england clam chowder
88. curried chicken salad with spicy sweet toasted cashews
89. deep fried avocado with crab salad
90. pork soup dumplings
91. spicy roasted corn & cotija salad
92. sea bass with tomato, green onions & serranos en papillote
93. clementine infused roasted yams
94. beet & goat cheese kugel
95. chicken with green jade vegetables
96. coffee cinnamon truffles
97. enchiladas de suiza
98. chicken & biscuits
99. green bean casserole from scratch
100. carnitas & hoisin on steamed buns

100th blog post! Curry Bihon: stir-fry curry noodles with shrimp & roasted pork belly

Guys! I've made it to 100 blog posts! This milestone really crept up on me. I can hardly believe it, but I actually didn't realize it was coming up until I looked at the previous post and suddenly it hit me: post number 99, which means next post will be 100! I wanted to do something special, so I'm sharing an incredible recipe today. Ok, two incredible recipes! More on that below. But first I want to mention the other special thing I'm doing for this post (an idea a friend helped me cook up - no pun intended. really. - when I mentioned it would be my 100th blog post and that it had snuck up on me): giving my readers a sneak peek at what I'm thinking about for the next 100 blog posts. Check out the list here

What makes Curry Bi Hon so special? Well, it is unbelievably delicious, for one! And not offered on many restaurant menus for another. To make it at home is a bit time consuming, even labor intensive. But it is a labor of love. You will have it confirmed with your first bite. Where does this dish come from? Well, Bihon is the name in Singapore of a certain type of thin rice noodle which you may have heard referred to as Mei Fun or rice vermicelli noodles. They are thin and very long as well as slightly gritty. Their mildly starchy taste is a perfect vehicle for complex, aromatic curry powder, succulent shrimp and fatty, sweet roasted pork.

I prepared the pork in char siu style (roasted with five spice) and it really helped make the dish not only authentic, but extra delicious. Even though it takes a couple of days to make the roast pork I highly recommend it. Most of it is downtime anyway while the pork marinates (overnight) or does its thing in the oven. I used Momofuku's cooking method (found on Lucky Peach), but not their seasoning recommendations. Instead I made my own five spice powder. This will make enough pork for three to four separate dishes, depending upon how much char siu you like in your stir fries or fried rice. I cut it into roughly 1/4" slabs and froze them separately, wrapped tightly in plastic wrap.


Five spice roasted pork belly (char siu)

Makes 3 lbs

For the five spice powder:
2 teaspoons ground cloves
6 star anise
4 teaspoons toasted szechuan peppercorns*
2 Tablespoons ground anise seeds
2 Tablespoons ground cinnamon

1. Grind star anise together with toasted peppercorns.
2. Pass through a sieve and mix with all other spices. Pulse in the spice grinder until everything is smooth and incorporated.
3. Transfer to a spice jar. It is now ready to use in cooking!

For the pork belly:

3 lbs pork belly
3 Tablespoons brown sugar
2 Tablespoons five spice powder
Salt, to taste
Pepper, to taste

1. Score the pork belly skin in a diamond shape. Salt and pepper both sides.
2. Combine sugar and five spice and rub one half of the mixture on each side.
3. Cover and marinate overnight.
4. Preheat the oven to 425. Line a baking sheet with tin foil and lay the pork belly skin side down.
5. Roast at 425 for 30 minutes, then turn the oven down to 250. Cook for another 1 to 2 hours (I found 1.5 hours to be perfect to render down enough fat and still keep the pork tender).
6. Allow the pork belly to cool completely, then wrap in plastic wrap and store in the refrigerator. Let it chill for at least a few hours before cooking with it, to allow the fat to solidify again so it will sear perfectly. Slice lengthwise as needed.
7. Reserve the rendered fat in the baking sheet and strain it into a freezer safe container. You’ll use this not only to saute your ingredients for curry bi hon, but also as a fat in any dish you’re going to use the pork belly in.

*toast them for about 3 minutes in a dry pan over medium heat


Curry Bihon (curry noodles with sauteed shrimp and char siu)

Makes 4 large servings

1 Tablespoon curry powder
7 scallions, sliced on the diagonal
1 ounce (approx 1 large carrot) julienned carrot
1 ounce (approx 2 stalks celery) julienned celery
1 ounce bean sprouts (mung beans)
2 eggs, beaten
1 package rice vermicelli noodles
2 Tablespoons rendered pork fat
1 thick slice char siu (five spice roasted pork belly), chopped
12 ounces shrimp, deveined
1 teaspoon neutral oil
Soy sauce, to taste
(optional): pepper, to taste

1. Assemble your mis en place: gather vegetables and heat your wok over medium heat. Use oil to cover the bottom of the wok, or spray with a nonstick spray. Pour beaten eggs into the wok, then twirl to spread eggs into a thin layer like an egg crepe. Lift outer edges of egg crepe and pour the excess raw eggs underneath. Do this all around and when there is little to no loose raw egg on top, flip the egg crepe and cook for another minute, or until it is not raw. Cool eggs and roll egg crepe up. Slice into ¼ inch slices. This will complete your mis en place.
2. With the heat under your wok still at medium, add 1 Tablespoon pork fat and ½ Tablespoon curry powder. Toast curry powder for one minute. Add shrimp in a single layer and cook for about 3 minutes, or until they begin to curl. Flip and cook for an additional 3 minutes. Remove from pan and set aside. Cover to keep warm.
3. Fill a large bowl with hot water (hot, but not boiling) and soak the rice vermicelli according to package directions.
4. When the noodles have been soaking for about 2 minutes, add remainder of curry powder and pork fat to the wok toast the curry powder for 1 minute. Add carrots and celery and cook for about 3 minutes. Add scallions and cook for another 2 minutes. Add char siu and bean sprouts and cook for another 1 - 2 minutes. Add noodles and eggs, stir well to combine thoroughly and cook for another 2 minutes.
5. Serve topped with shrimp.

Tuesday, February 16, 2016

Homemade BBQ Sauce - Get to Grillin'

Grilling season is more or less back! It seems as though it would be intimidating, but you wouldn't believe how easy it is to make your own barbecue sauce! And during grilling season it's a pantry staple. What's so fantastic about homemaking it is you can really tailor it to your's and your family's tastes! I prefer mine to be a bit sweet, but also a bit tart with a hearty helping of heat and an easy to identify smoke flavor. This sauce turned out exactly the way I wanted it. If you prefer less heat reduce either the cayenne or sriracha.

Here's my simple yet delicious recipe for zingy BBQ sauce.

Smoky, Spicy BBQ Sauce


*10 ounces crushed fire roasted tomatoes
*1/4 cup brown sugar
*2.5 Tablespoons apple cider vinegar
*1 Tablespoon sriracha
*1/2 teaspoon cayenne
1 Tablespoon smoked paprika
Salt, to taste
Pepper, to taste

1. Combine all ingredients in small sauce pan over medium-low heat.

2. Stir frequently until sugar has melted.

3. Reduce heat to low and simmer for about 1 hour, or until mixture turns brown and semi-glossy.

Thursday, January 21, 2016

Sour Cream and Onion Mashed Potatoes

Put your diet resolutions on hold for just one more meal! This side dish is inspired by one of the most popular flavors of potato chips in America: Sour Cream & Onion. I’ll confess it was born out of my desire to use up the last of my sour cream and my green onions before they went bad. However, once I tried these potatoes, I was hooked! Starchy-sweet potatoes make a perfect base for crunchy, earthy and slightly spicy green onions and tart, rich sour cream.

Sour Cream & Onion Mashed Potatoes


2 1/2 lbs. potatoes, cut into large cubes
1/2 cup sour cream
1/4 cup milk
3 T butter
7 green onions, sliced*

1. Add potatoes to a heavy bottomed pot, then water to cover. Bring to a boil and cook, covered, until potatoes are fork tender. Meanwhile cut the butter into 1/2 T pieces.
2. Drain nearly all of the water out. Sprinkle the butter pieces across the potatoes equally. Mash the potatoes, starting all around the outer edge of the pot and working your way into the center in a spiral. Halfway through add milk & sour cream.
3. Add salt & pepper to taste and fold in green onions.

*slice the paler parts closer to the root and discard the papery dark green tops